In the event you wish to share access to your client area you can add additional users to your account. The access controls are granular so that you can pick and choose what the user can and cannot do.
If, for example, you just want to give your developer access to your cPanel, you can provide them with the ability to perform "Single Sign-On" and "View Products & Services" but not access to invoices or billing. You could additionally give them the ability to view and open support tickets so they can access our support without having to make you the go-between.
If you are attempting to transfer ownership of the account please contact our Support Department for assistance.
First you need to access our Client Area and do the following.
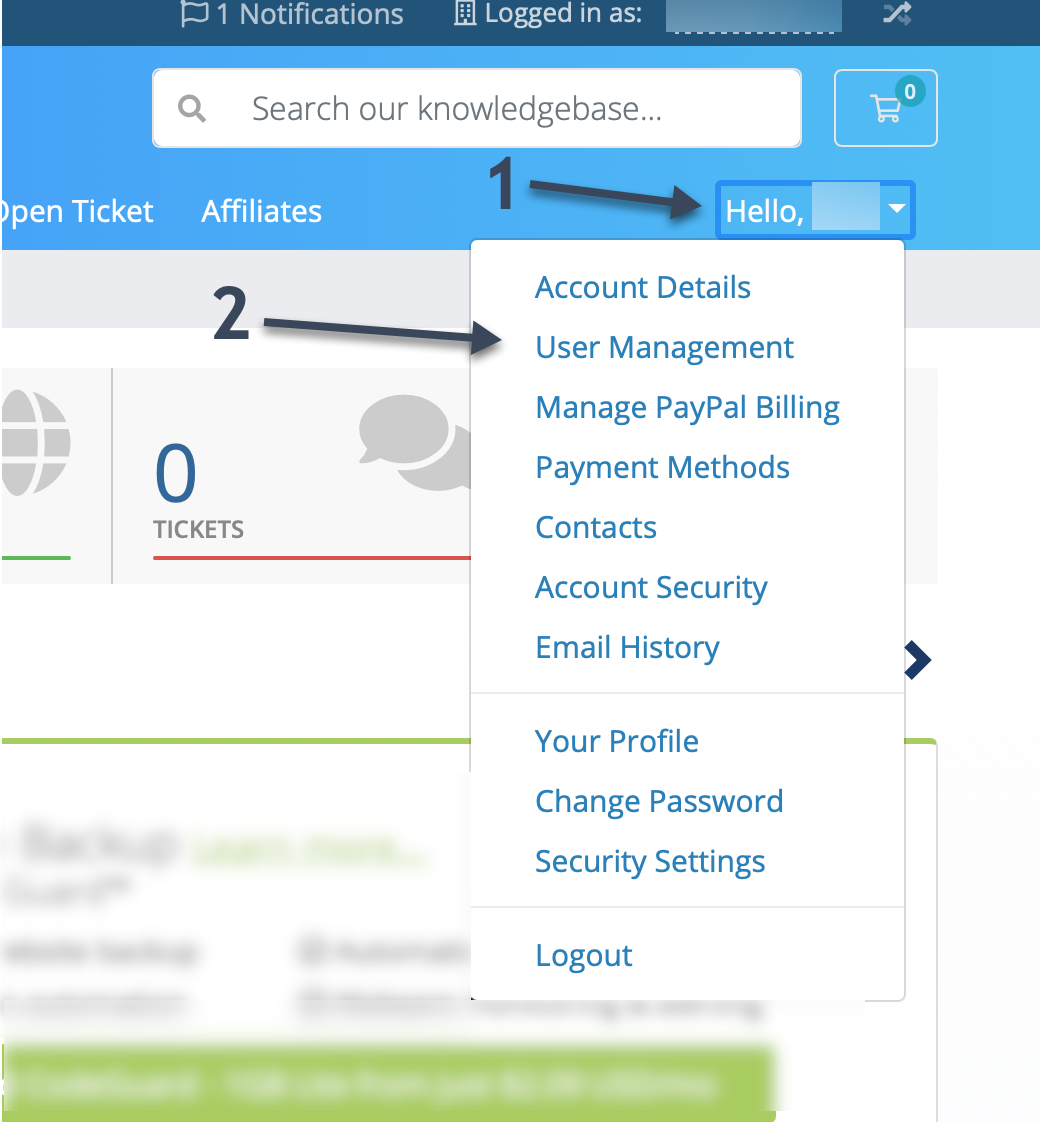
- Locate and click the 'Hello' drop-down menu on the Client Area homepage. (#1)
- Click on 'User Management'. (#2)
On the 'User Management' page you will be presented with the following options.

- Enter the new Users email address in the box. (#1)
- Either select 'All Permissions' to allow access to everything. Or select 'Choose Permissions' to allow access to specific portions of the Client Area. (#2)
- Modify Master Account Profile - Allows the User to modify the account profile details. (Please note that most of these details can only be changed by our Support Staff.)
- View & Manage Contacts - Allows the User to access and create contacts on the account. This allows additional people to receive email notifications about the account.
- View Products & Services - Allows the User to see which products and services are active within the account.
- View & Modify Product Passwords - Allows the User to manage passwords for things like the cPanel account.
- Perform Single Sign-On - This allows the User to access the cPanel with one click without the password.
- View Domains - This allows the User to view the Domain Names linked to the account. (Only if we are your domain provider.)
- Manage Domain Settings - This allows the User to change details on the Domain Names. This includes Nameservers, Who-is, and Transferring Domains.
- View & Pay Invoices - This allows the User to view and pay invoices generated on the account.
- View & Accept Quotes - As we do not use Quotes within our service this is not needed.
- View & Open Support Tickets - This allows the User to create Support Tickets to our various departments.
- View & Manage Affiliate Account - This allows the User to view Affiliate details including available funds.
- View Emails - This allows the User to view any Email messages sent by us about the account.
- Place New Orders/Upgrades/Cancellations - This allows the User to order new products, upgrade current products, or cancel products.
3. Click 'Send Invite' to complete the process and send log-in details to the User. (#3)
We do recommend the "Perform Single Sign-On", "View Products & Services", and "View & Open Support Tickets" options if you are adding your developer as a user.
If you intend to accept the invitation yourself, such as on the new user's behalf, please sign out of the support system before clicking on the invitation link in the email.
Please reach out to our Support Team if you need further assistance or explanation.
