Some images have been resized to better fit your display. You can click on images to view them full size if they have been resized.
Determining the location of your WordPress Files and which Database you should restore.
If you are unsure where your WordPress files for your site are located, or which database your WordPress site uses, we have an article that shows you how to identify this information:
Identifying where your WordPress files are stored and what database your WordPress Site is using.
Restoring the database.
- To restore the database you will access your cPanel and click on "JetBackup" in the "Files" section.
If you see "JetBackup 5" instead of "JetBackup" you will need to use this article instead: Restoring a WordPress Site using JetBackup 5
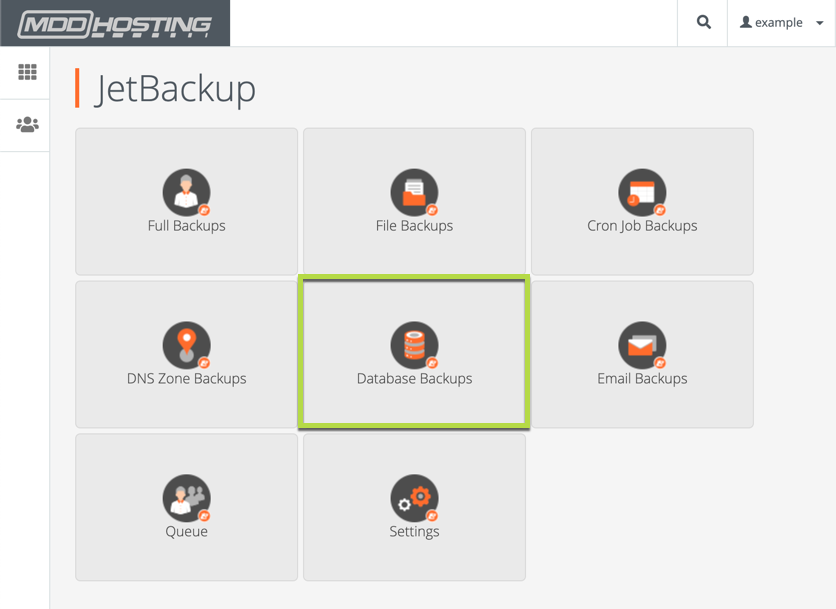
- Click on "Database Backups".
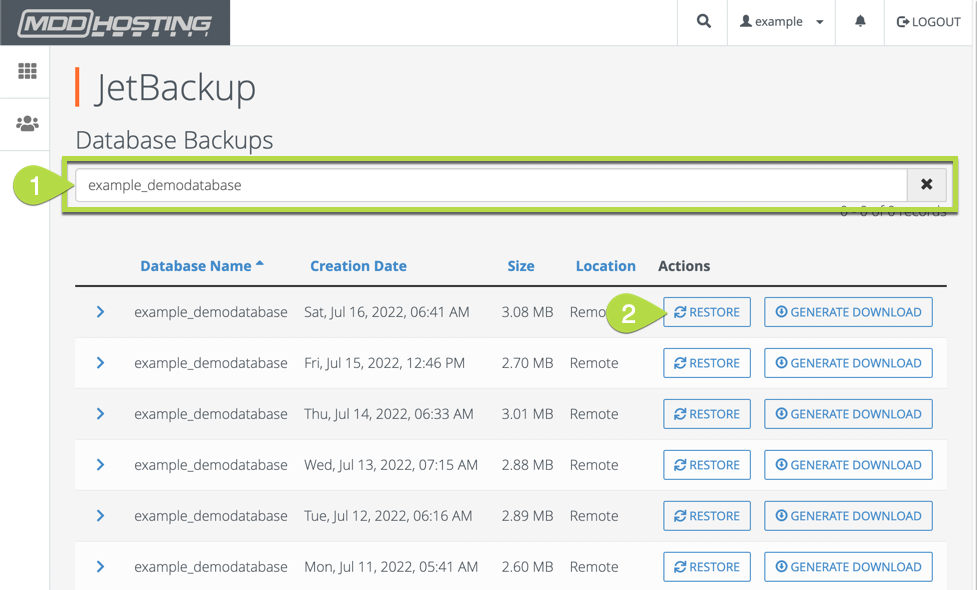
- Enter the database name you wish to restore in the "Search" box and select "Restore" next to the version of the database you wish to restore. This will generally be the most recent backup but you can choose whichever version you wish.
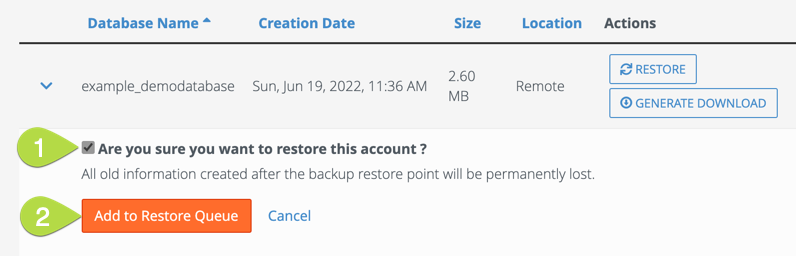
- You will need to check the box for "Are you sure you want to restore this account ?" and then click "Add to Restore Queue".
- The restoration of the database backup is now in progress.
Restoring the Files
- To restore the files you will access your cPanel and click on "JetBackup" in the "Files" section.
- Click on "File Backups".

- Choose the date you wish to restore the files back to and click on the "File Manager" button on that row.

- Check the box for the folder that you wish to restore, in this example "demo.com", and click on "Restore Selected".
In the event that you are restoring your primary domain, which is in the "public_html" folder, you may need to click on the folder itself and manually select the files associated with your main site. If you restore the entire "public_html" folder it is possible you may restore files for other domains on your account. While the default and recommended method of adding domains is to put them in their own folders outside of the public_html that is not always the case.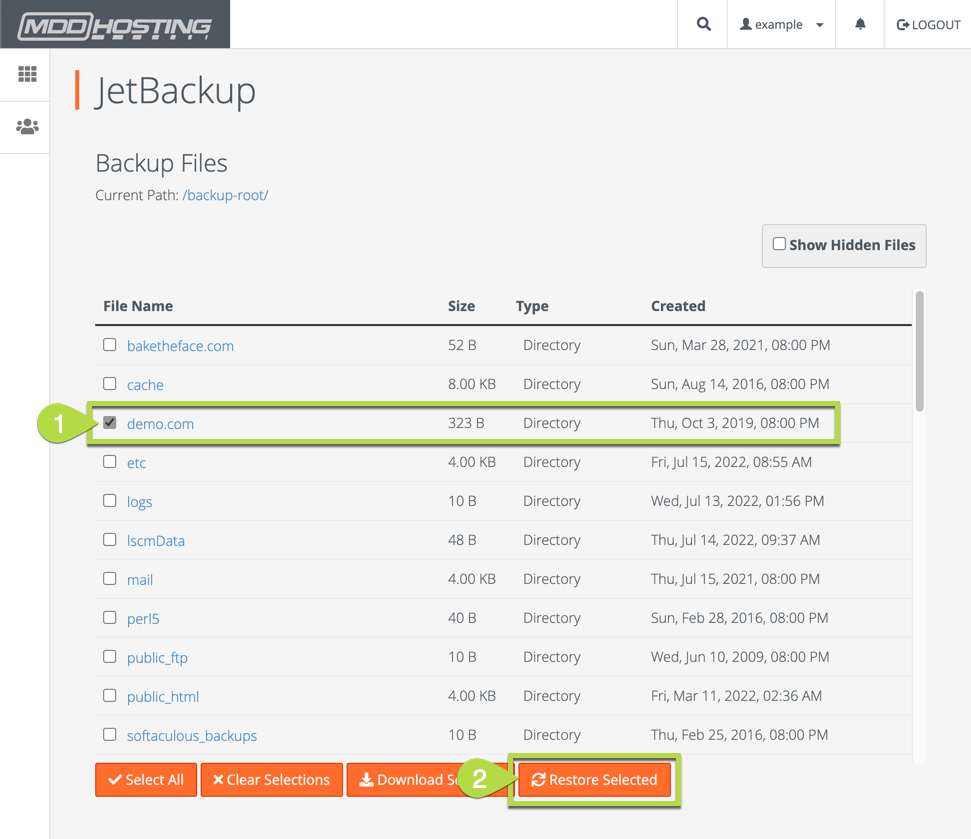
- Check the box for "Are you sure you want to restore this account ?" and then click "Add to Restore Queue".

- The restoration of the files is now in progress.
Checking the status of the restorations.
It can take anywhere from a few seconds all the way up to many minutes to restore your files and databases. How long this takes varies based upon your content and JetBackup does not give an estimate.
You can check the status of the restorations - whether they are still in progress or completed.
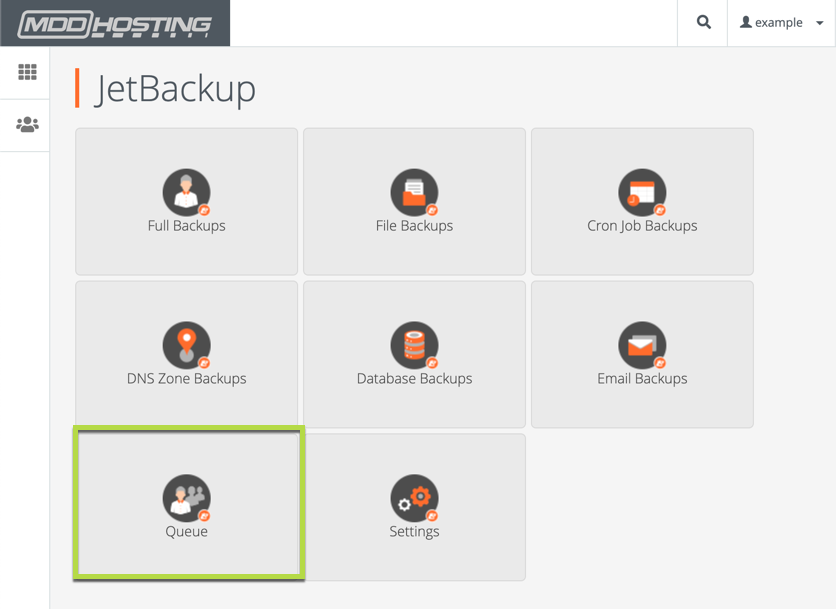
- To check the status of the restorations access your cPanel and click on "JetBackup" in the "Files" section.
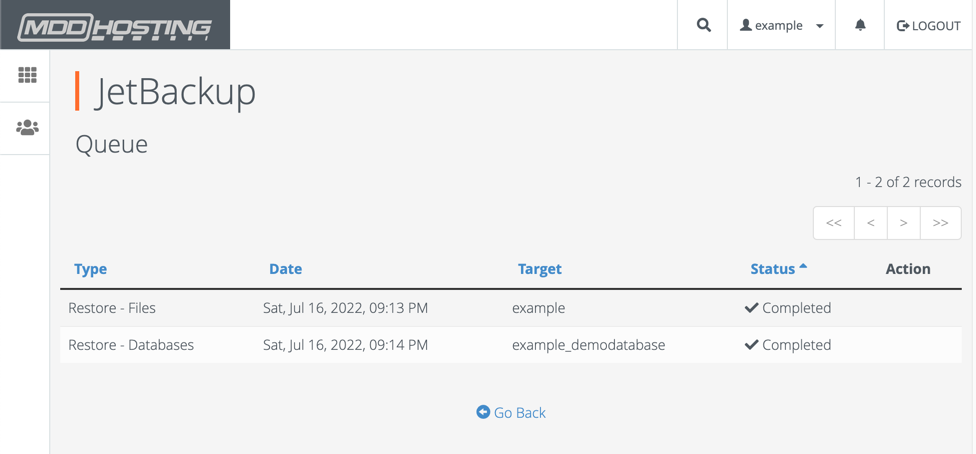
- Click on "Queue".
- You can see the status of any restorations. They will either be "In Progress" or "Completed".